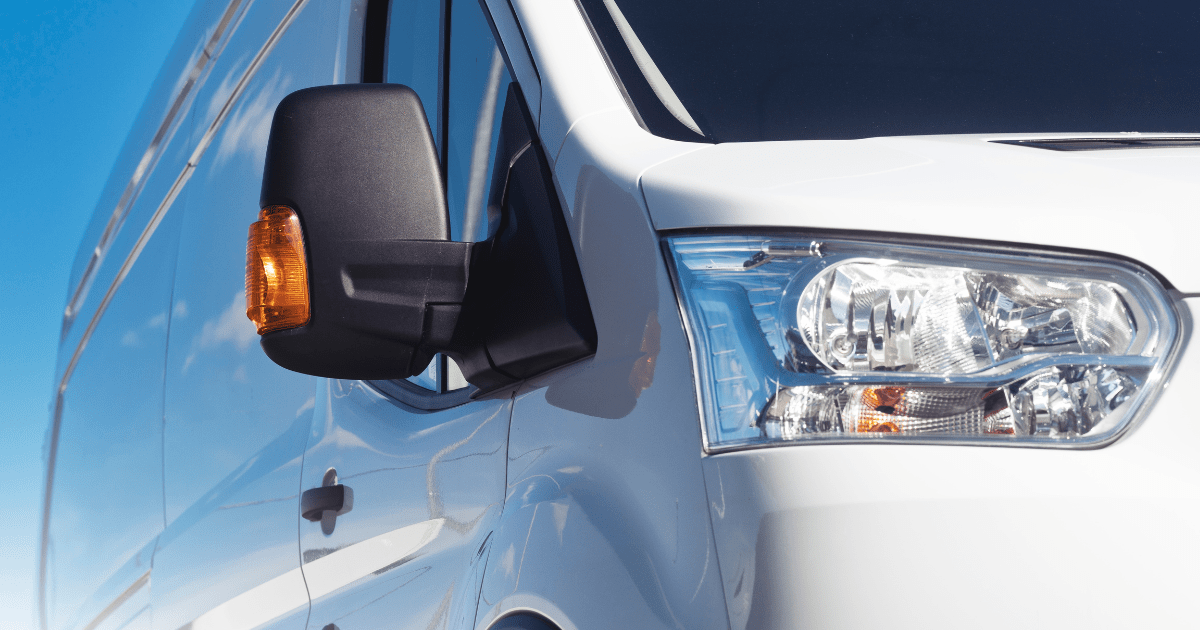
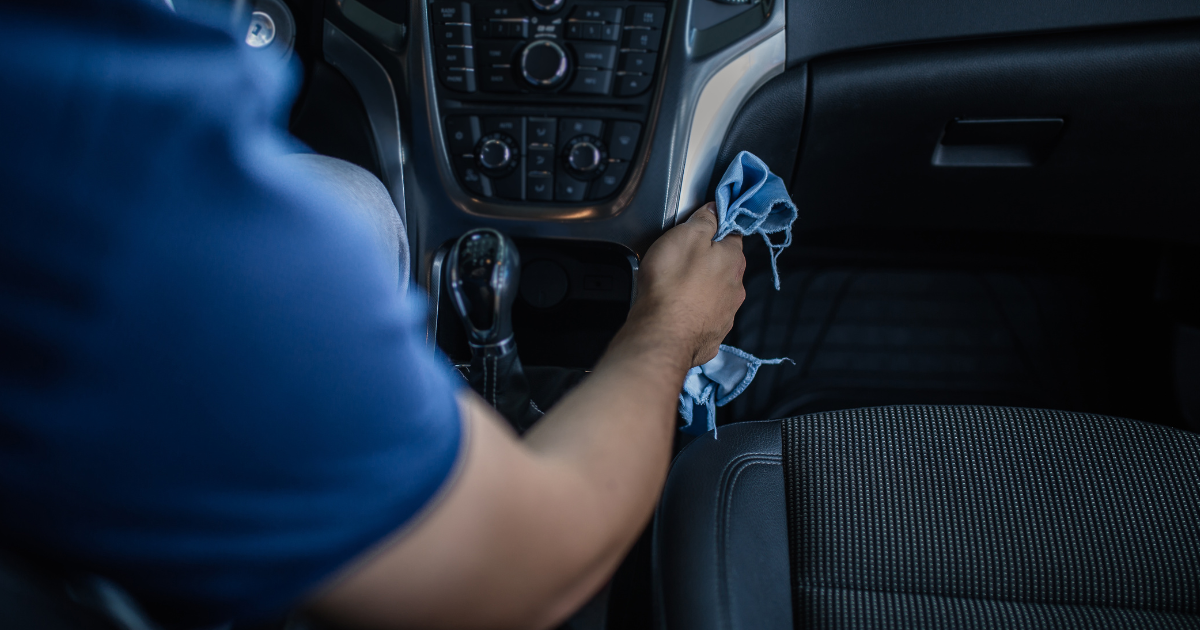
Thinking about launching a website for your mobile valeting business but not sure where to start? You’re in the right place.
Today, I’ll show you how to build a fully working website that puts your mobile valeting business on the digital map. No jargon. No waffle. Just simple steps you can actually follow.
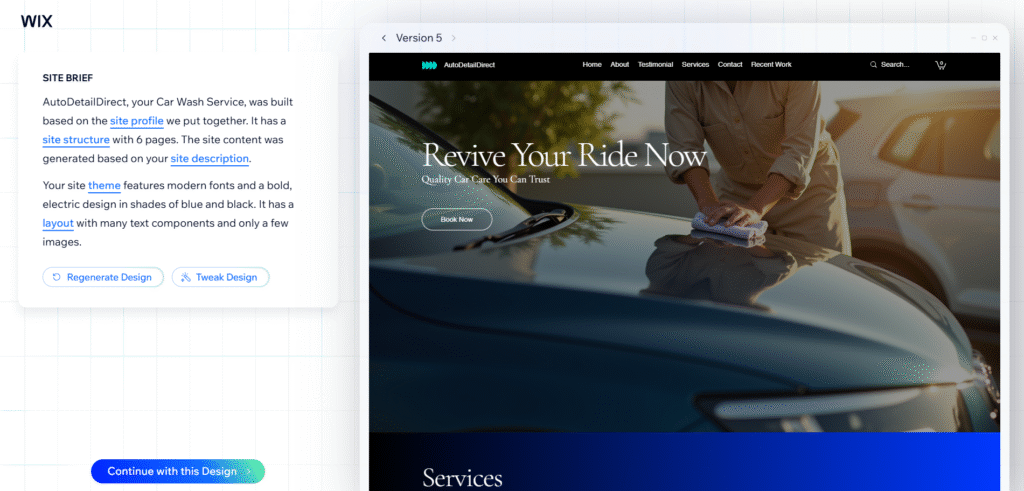
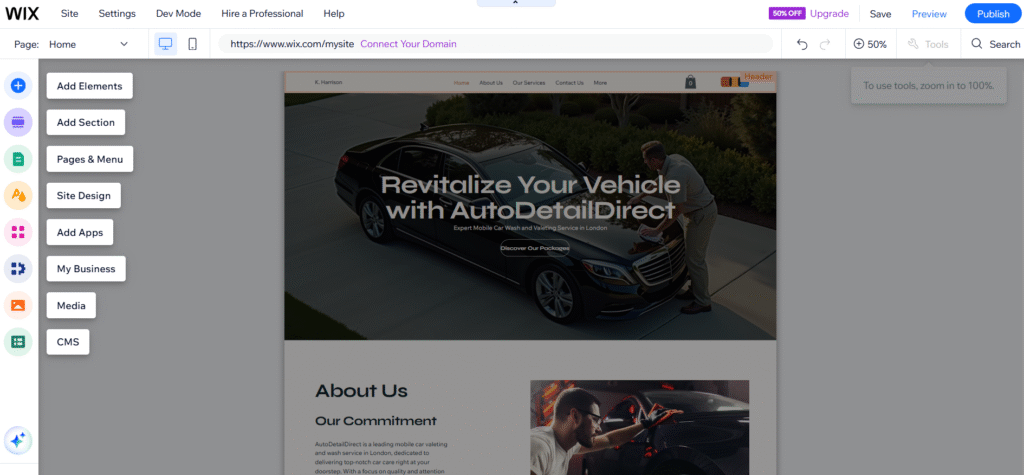
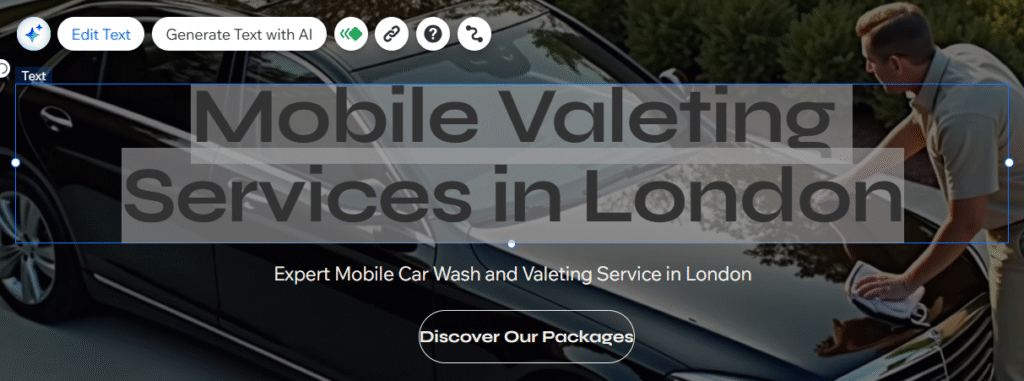
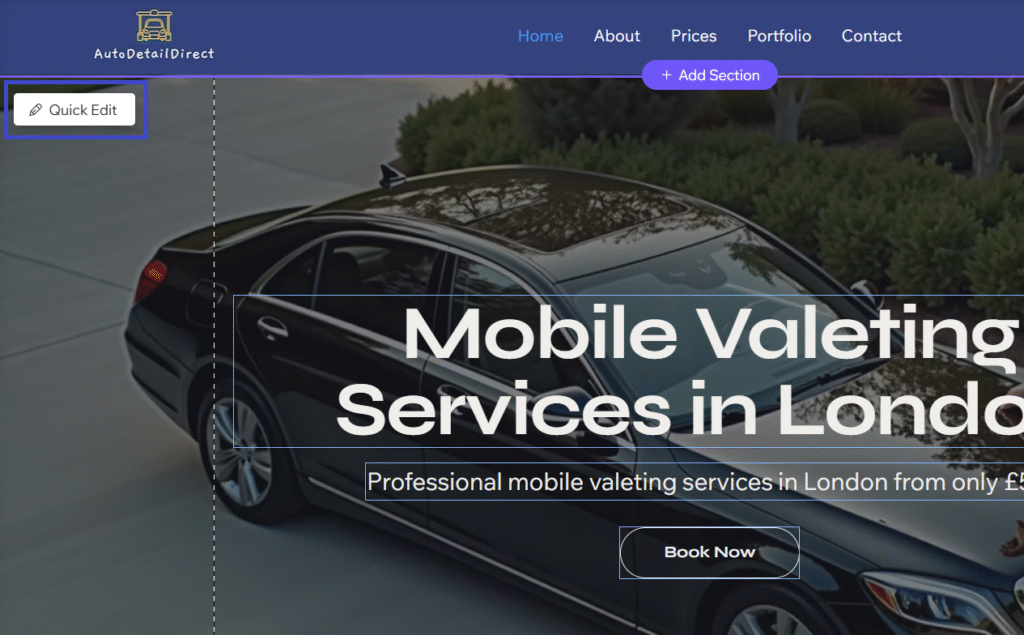
To give you an idea of what to expect, here’s a snapshot of the website I built using the steps in this guide:

Now let’s get into it.
Step 1: Join Wix for free
To create your website, we’re going to use Wix. It’s a top website builder that’s user-friendly, reliable, and perfect for small businesses. Better still, it’s completely free to make a basic website with Wix.

Paid plans are available. However, these are totally optional and only needed if you want extras like more storage and bandwidth. For now, we’ll stick with the free plan to get your site up and running.
So, head over to the Wix website and join for free.
After signing up, you’ll be asked to start a chat and answer a few questions. This will allow Wix to personalise the admin dashboard of your site:

Describe your website in as much detail as possible. The more information you include, the better Wix can understand what features you’ll need:

Next, tell Wix the name of your website:

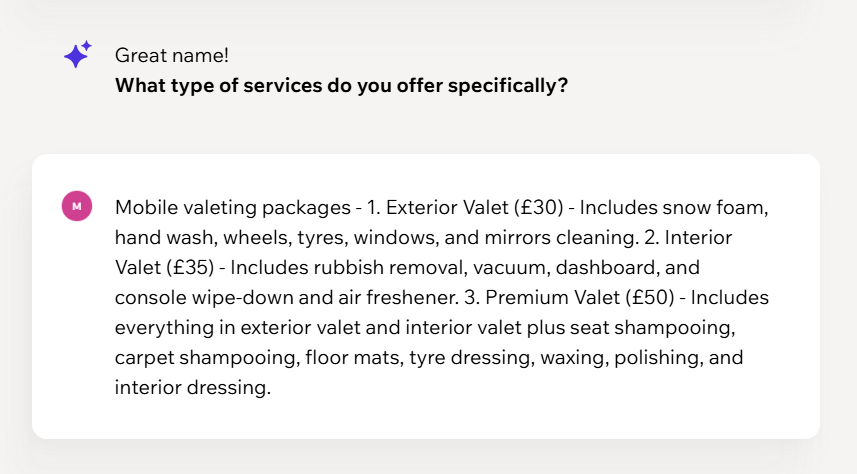
Now, add a breakdown of your mobile valeting packages and prices. Try to keep it simple and clear:
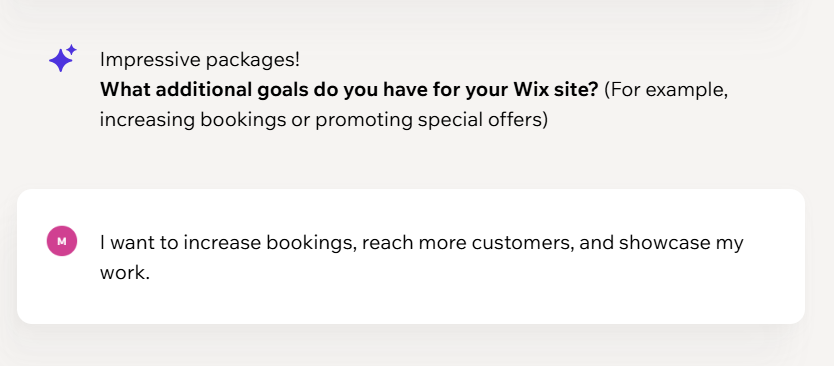
For additional goals, explain what you want to get out of the website:
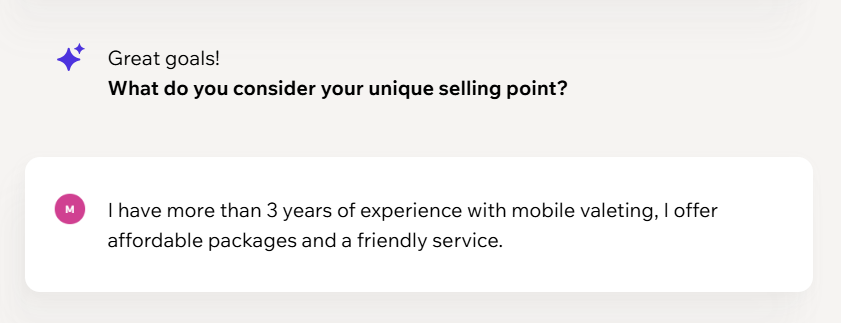
Finally, describe the unique selling points of your business:
After answering the questions, you’ll arrive at the Wix admin dashboard. It will be tailored to fit your business needs.
Step 2: Choose a template
In the admin dashboard, you’ll notice some setup steps to complete. For now, we’re going to ignore these and go straight to editing the frontend of the website. To do this, click the Design Site button:

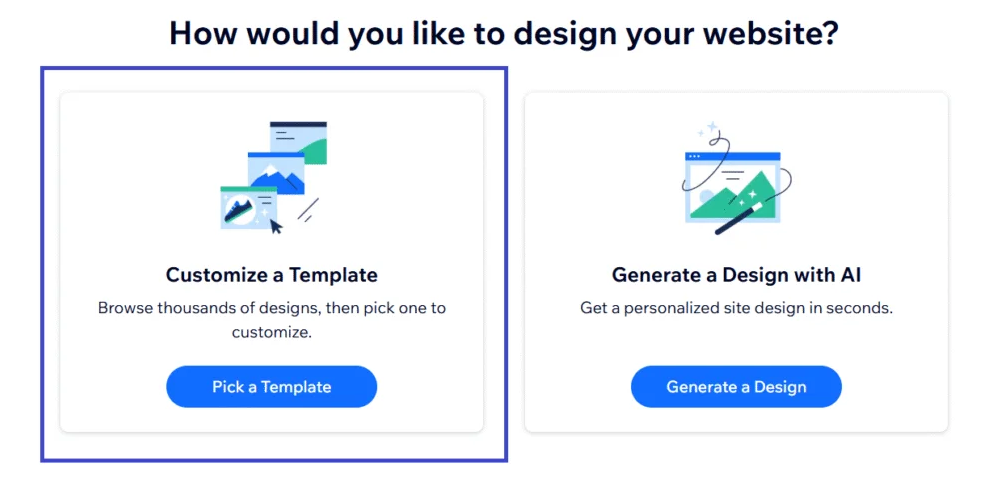
After clicking the button, you’ll be taken to a page where you have two options: choose a premade template or generate a design with AI.
With the AI option, you’ll answer a few questions so Wix can generate a personalised design for your site. You can generate multiple AI designs and choose one that best suits your brand. The design can be tweaked in the next step.
Generating AI designs is easy but it does have some disadvantages. For starters, the software can be slow and glitchy. Plus, it only lets you generate one design at a time. You might end up spending a lot of time just generating designs to find something suitable.
With that in mind, we’re going to use the Customise a Template option. This lets you browse thousands of ready-made templates and skip the ”endless AI design roulette”.
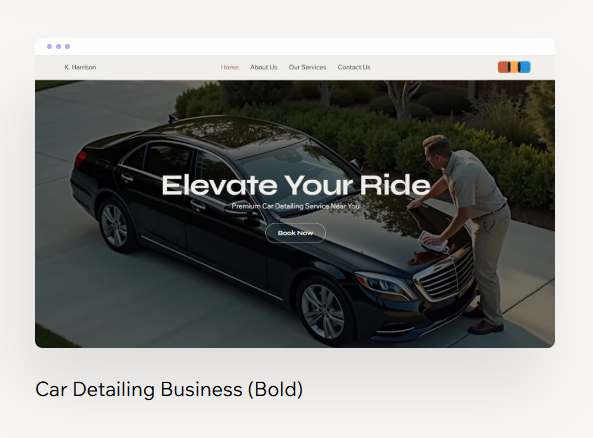
Wix has over 2000 free templates including options for car wash businesses. Every template is fully customisable, allowing you to change fonts, colours, images, and styles. Take some time to find a template you like and click the Edit button next to it.
In this case, I’m going to use the Car Detailing Business (Bold) template. It’s clean, modern, and simple:
After picking a template, you’ll be directed to the frontend editor. The drag-and-drop interface lets you change any part of the site with ease.
Step 3: Configure pages
📆 Book a mobile valet near you
We'll match you with an approved valeter in your area — simple, fast, and hassle-free.
Before we starting tweaking the design, we need to configure the pages. To do this, click the Pages & Menu option in the sidebar:
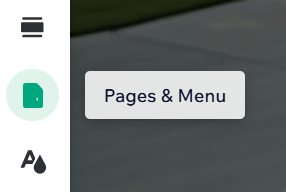
Here, we want to ensure we have 5 main pages: Home, About, Prices, Portfolio, and Contact. Wix usually sets up some pages automatically. Keep these pages and simply edit their names or add any that are missing.
In my case, Wix has created the following pages: Home, About Us, Our Services, and Contact Us. I’m going to shorten the names and add an extra Portfolio page:
For the extra portfolio page, I selected the Portfolio page template under the Dynamic Pages option:

You can rearrange the order of the pages by dragging and dropping them. You only need a Home, About, Prices, Portfolio, and Contact page so just hide any extra pages created by Wix.
Quick Tip: You’ll also need a privacy policy page. Wix should automatically create one for you. This will be discussed more in the Design Other Pages section of the guide.
Step 4: Understand apps
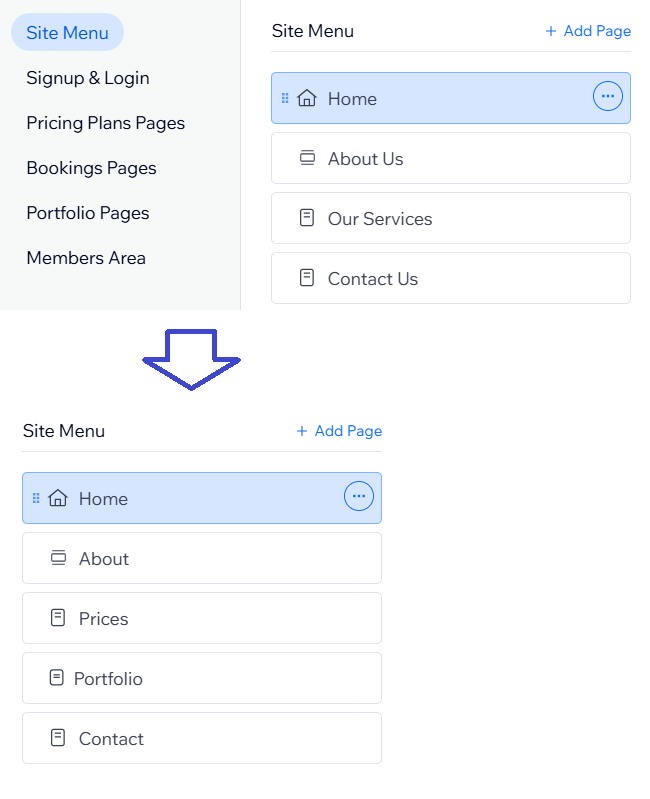
Before we go any further, you need to understand what Wix apps are. Wix has hundreds of apps which can be installed on your site to add extra features like live chat, online bookings, pricing tables, and slideshows:
When setting up your site, Wix may install a few apps automatically. Some of them require a paid subscription or have fees. However, you don’t need any premium apps to build a basic mobile valeting website, so don’t worry about them for now.
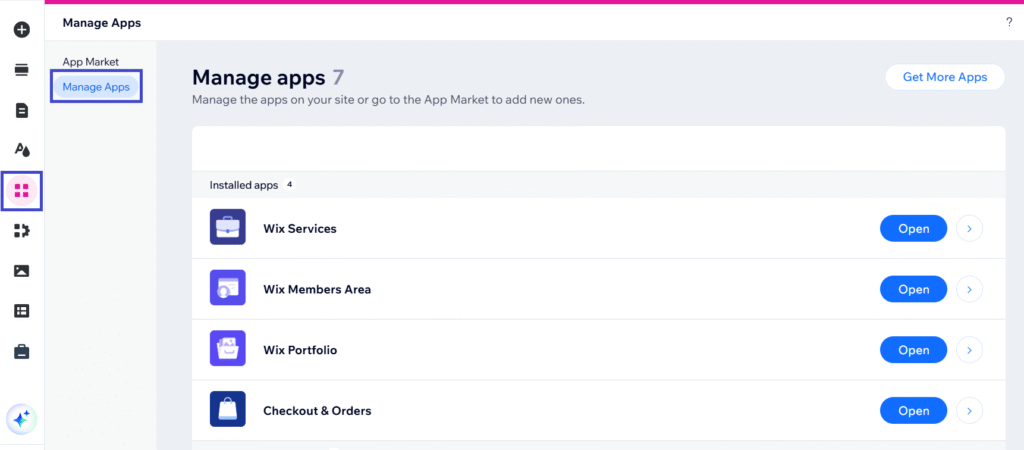
If you want, you can delete any apps you don’t need. However, you should only do this if you’re certain your site isn’t using them. It’s fine to leave apps installed even if they’re not being used.
You can view what apps are installed on your site by going to the Manage Apps page:
Step 5: Build a header
Now that you have some pages created and an understanding of apps, it’s time to build the header of your site.
Wix will automatically add a menu to your header. You just need to upload your logo and add any extras you want like social buttons.
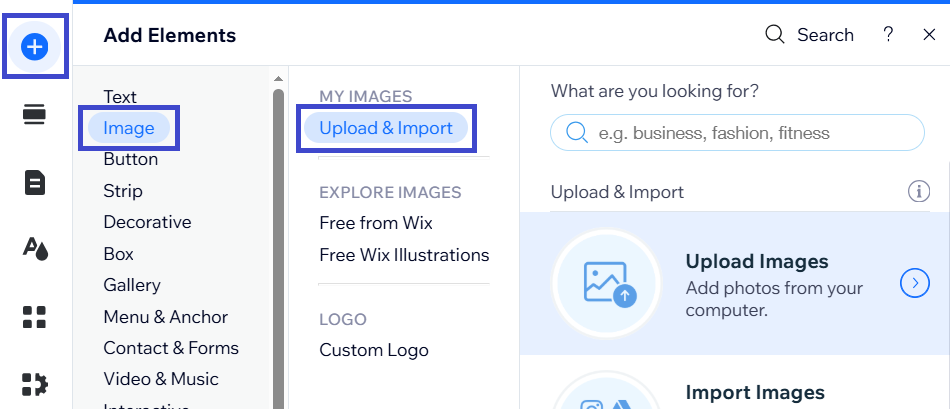
To do this, click the Add Elements icon and select Image > Upload Image:
Upload a logo from your device. If you don’t have a logo, you can create one using Wix’s free logo maker. I manage to quickly craft some pretty cool designs using the AI tool:
Once you’ve uploaded a logo, simply drag and drop it to where you want it on the header:
You can adjust the size of the logo by clicking it and dragging the edges, or edit the overall height of the header to make the logo fit.
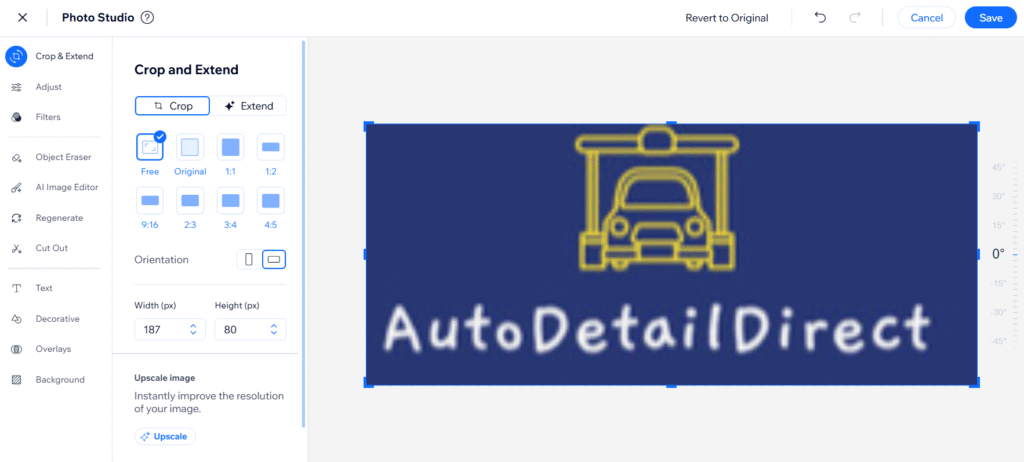
If you want to crop the logo or remove the background, just click on it and select Edit Image. Wix has a built-in photo editor that lets you change any image with ease:
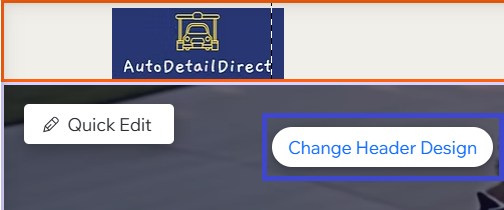
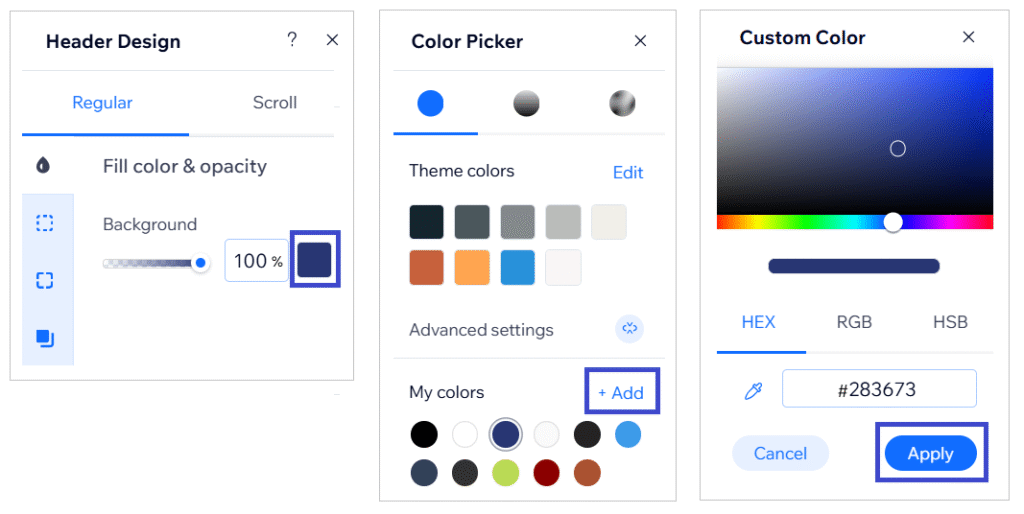
For this site, I’m going to keep the background colour of the logo and simply change the colour of the header to match. To do this, I’m going to highlight the header and click Change Header Design:
To get the exact colour I need, I’m going to use a free colour picker tool. This will tell me the HEX code of the logo’s background colour, which I can then put into the Wix colour selector:
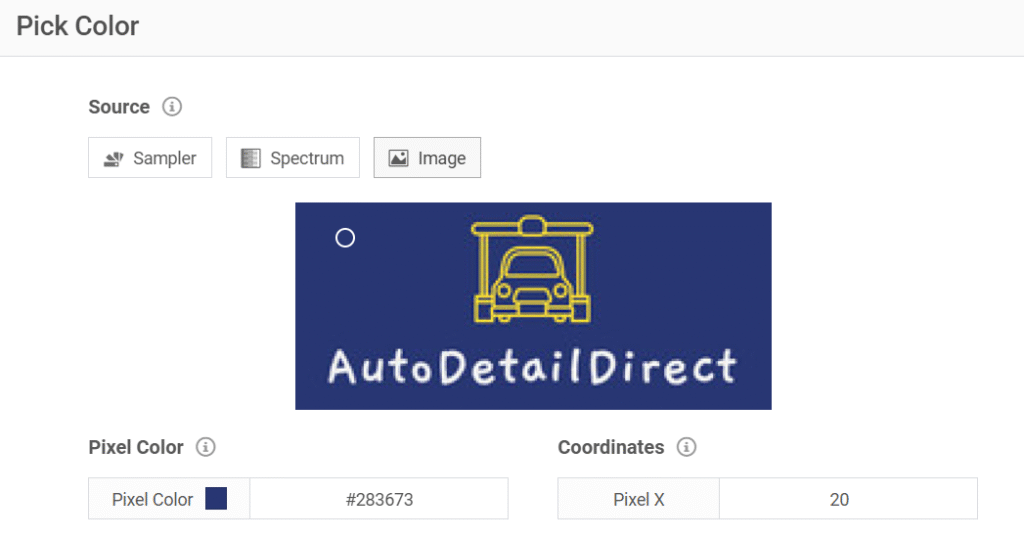
The code for this particular shade of blue is #283673. I simply copy and paste this code into the Wix header colour settings:
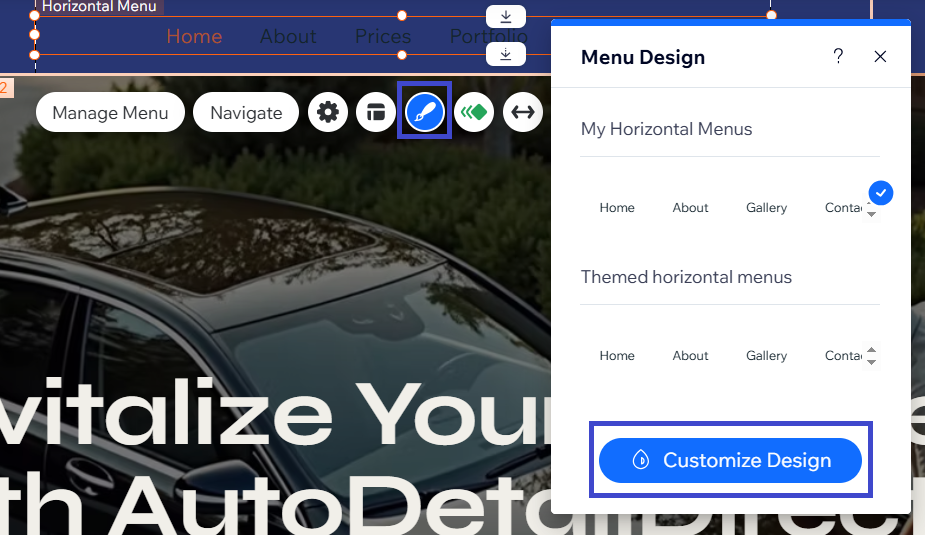
As the header colour is now a dark blue, I’ll need to change the colour of the menu text. To do this, highlight the menu by clicking it, select the Design Icon and then click the Customise Design button:
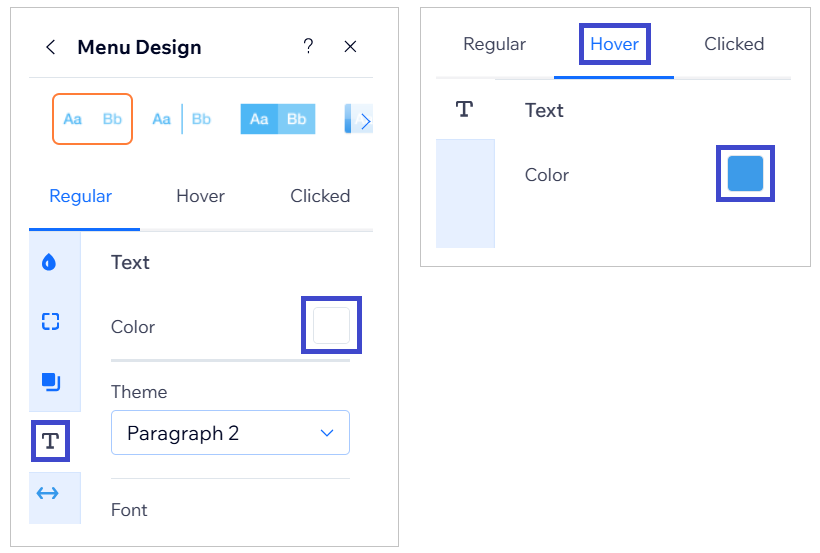
From here, I’ll change the Regular colour of the menu text to white and the Hover and Clicked colour to light blue:
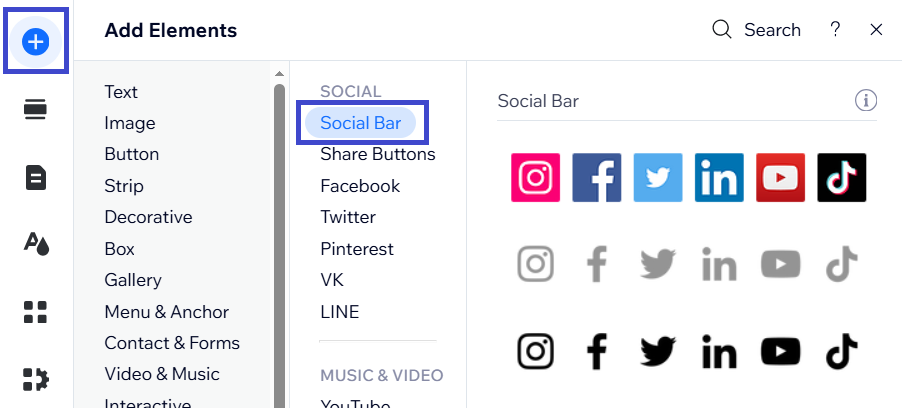
Lastly, I’m going to add some social buttons to the header. To do this, I clicked the Add Elements button and selected Social. Wix has different social bars to choose from. Simply click the one you like and drag it onto the page:
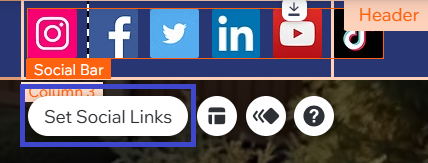
To add the links, highlight the social bar element and click Set Social Links:
We now have a professional and complete website header. You can customise it further by highlighting the header and clicking Change Header Design. Here you can add borders, shadows, and tweak the transparency.
Play around a bit until the header is exactly how you want it.
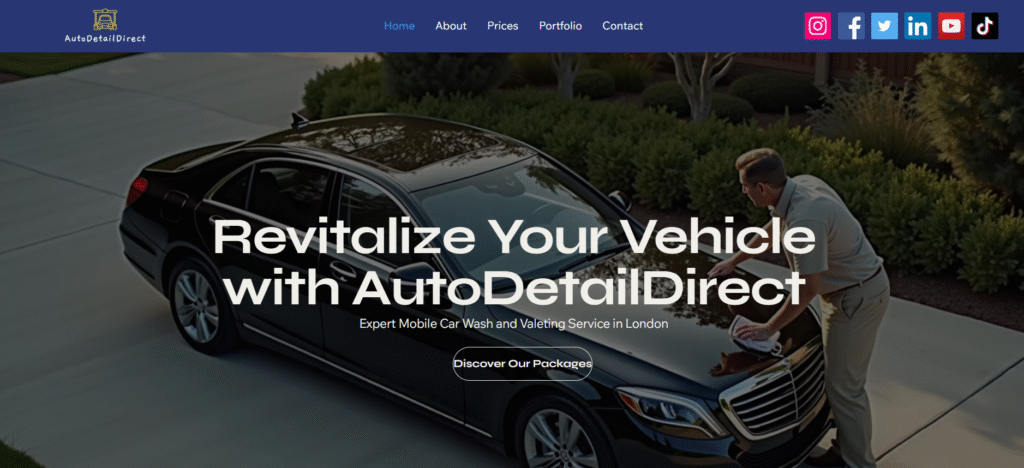
Here’s the final header design for my website, pretty cool, huh?
Quick Tip: Follow the same steps to design the footer of your website. It should include your logo, pages, contact info, and a copyright notice.
Step 6: Design the homepage
📆 Book a mobile valet near you
We'll match you with an approved valeter in your area — simple, fast, and hassle-free.
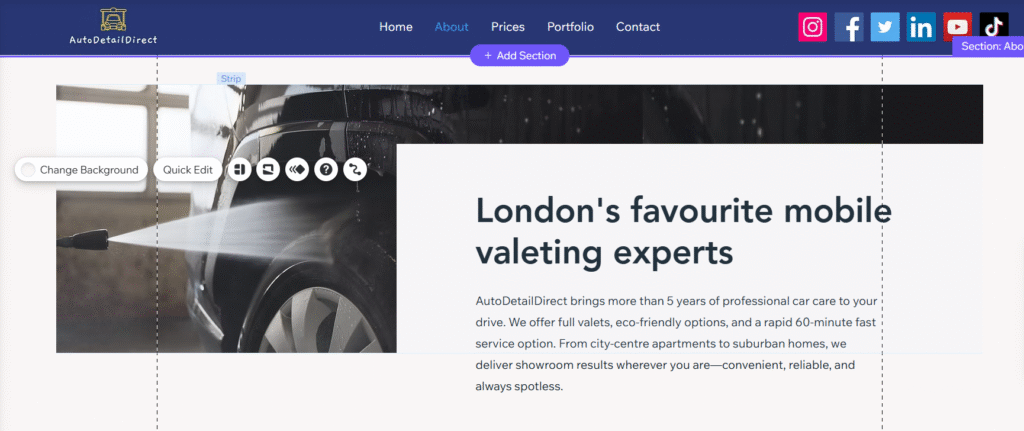
So far, we have the essentials configured and a header built. Now it’s time to design the homepage.
Whichever theme you picked at the start, Wix will automatically populate your site with content including sections and elements.
Put simply, elements are individual blocks of content like titles, paragraphs, and images, whereas sections are predesigned blocks containing different elements to form a layout, like 2 columns with an image and a paragraph.
You can tweak elements and sections by clicking them and selecting Edit.
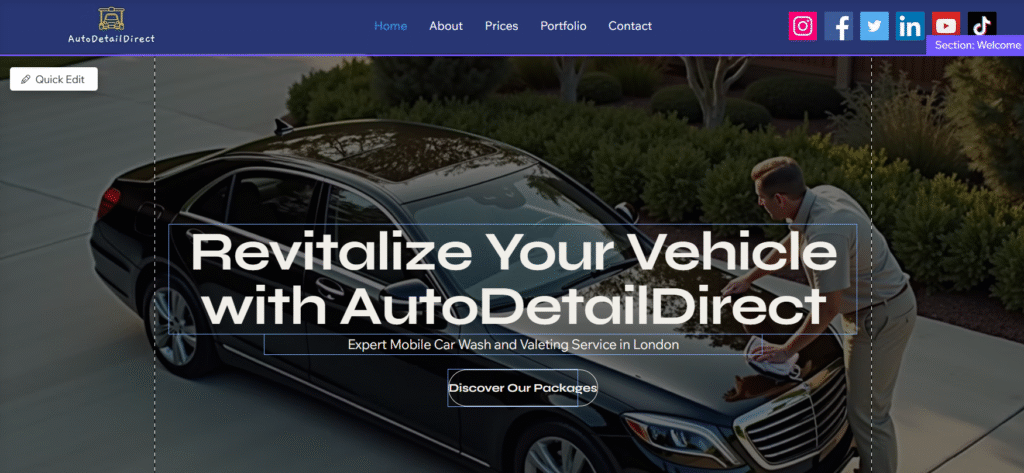
For example, the first section on my homepage is a large image with an overlapping header, paragraph, and button:
I’m going to start by changing the heading text and description to something more engaging. It’s important to include relevant keywords in the title and description to improve visibility in search engines, something like Mobile Valeting Services in London.
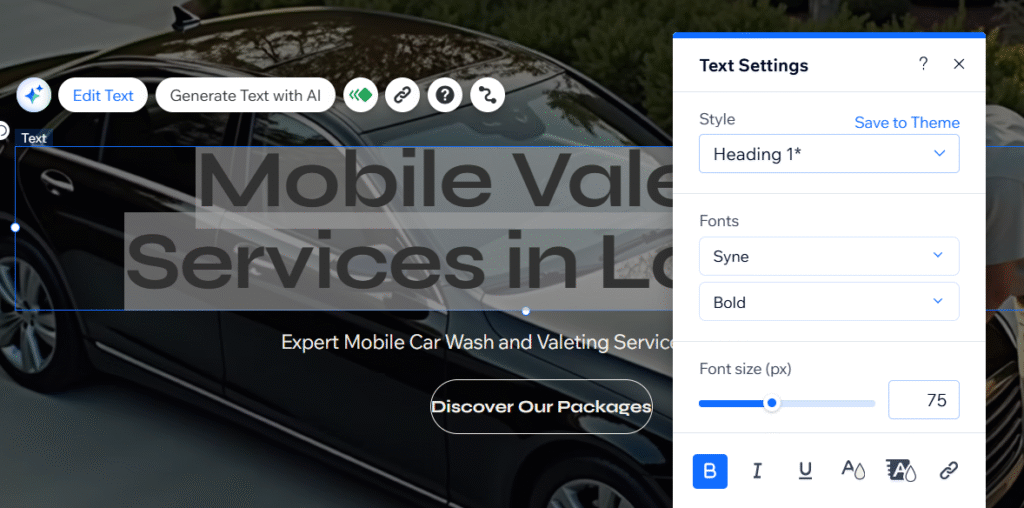
For this, all I need to do is click the element, a title in this example, and select Edit Text. Now I simply type in the new text:
When editing any element, a popup box will appear, offering more customisation options. With a text element, I can change the font type, size, colour, and even add effects:
The options in the popup will be different depending on the type of element. For example, I’m now going to edit the button’s text. I just need to click the button and select Change Text:
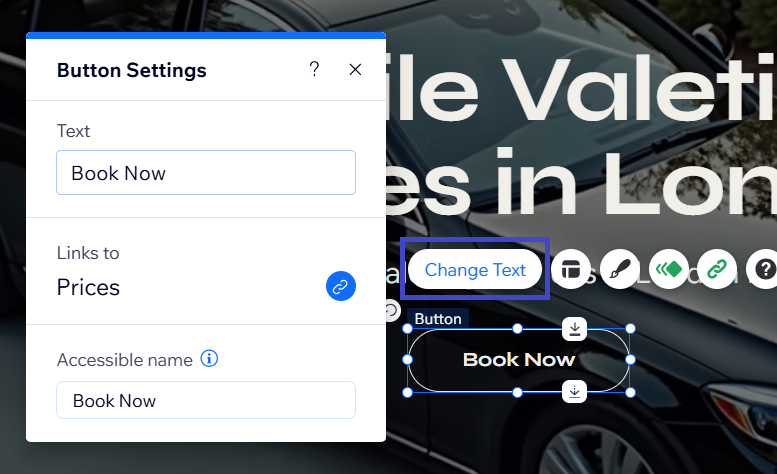
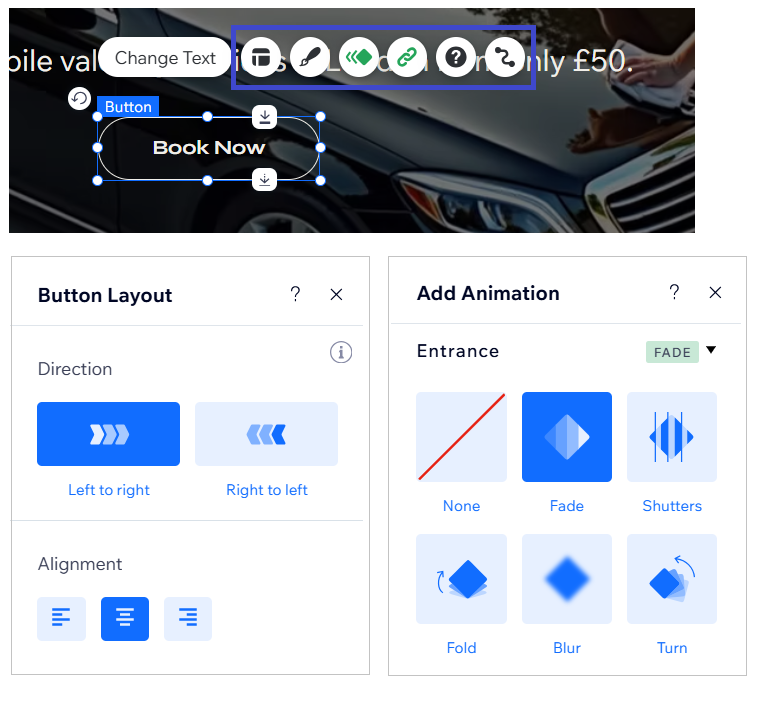
You’ll notice other options alongside highlighted elements. These allow you to further customise the element. In the case of a button, I can change the design, add animations or effects, and link it to another page on the site:
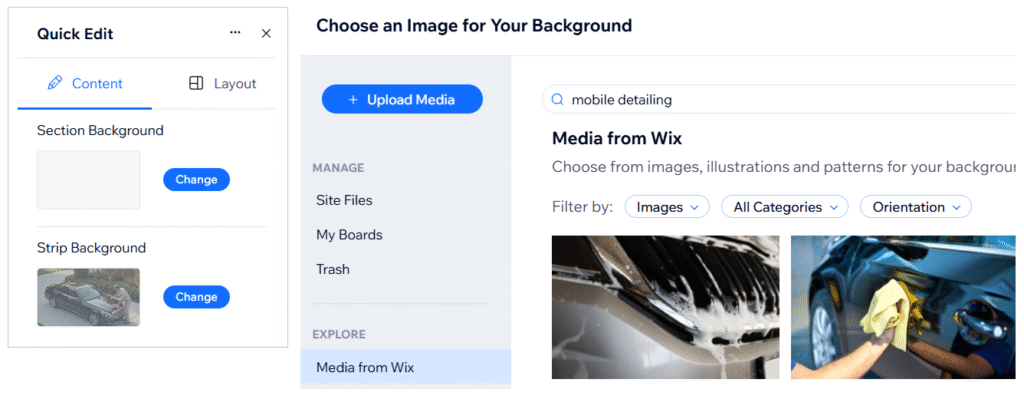
Similar to elements, sections can also be edited by highlighting them and clicking Quick Edit:
You can change the image, background colour, and layout in just a few clicks. Everything you need, including a library of thousands of free images, is built into Wix:
You can also add new elements and sections to the homepage. Just click the Add Element or Add Section icons.
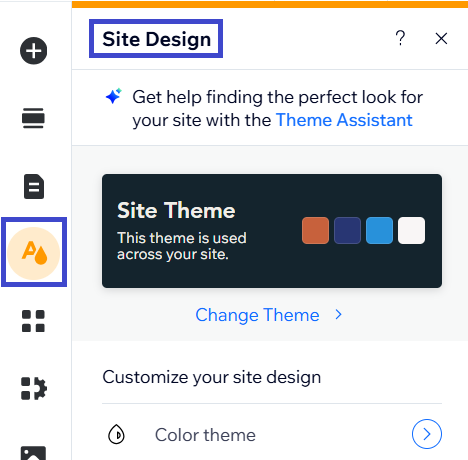
Quick Tip: You can customise the overall design of your website by navigating to the Site Design section. This will allow you to change the font, colours, and sizes across the whole site.
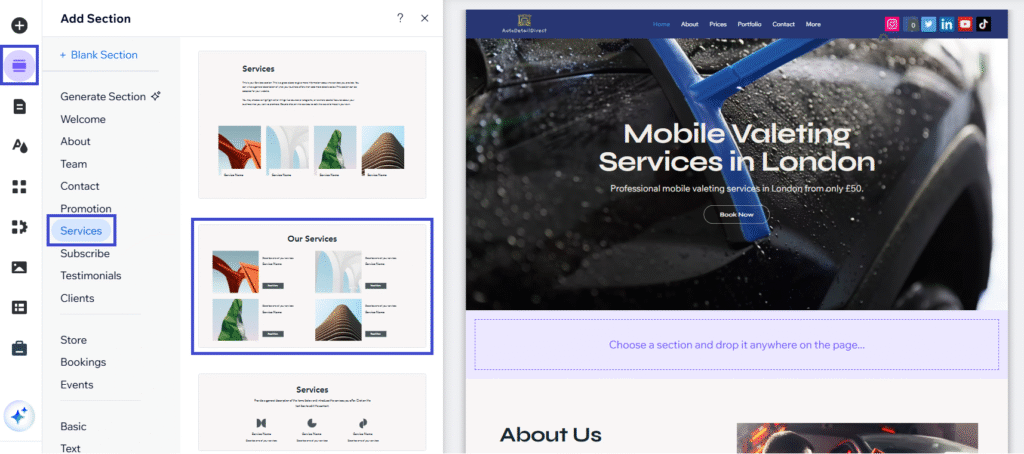
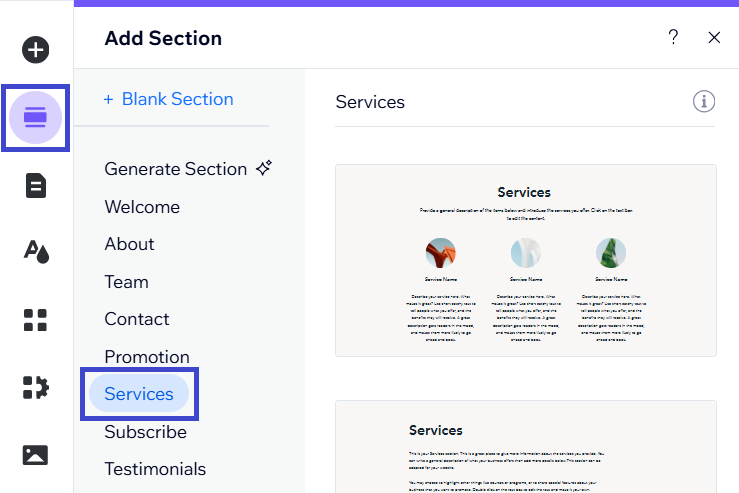
For example, I’m going to add a new pricing section directly after the intro section on the homepage. I just click Add Section, navigate to the Services option, and drag and drop the section to wherever I want it on the page:
In some cases, Wix will create the content for the section using the information you provided during signup. Alternatively, you can write the content yourself or generate it using the AI writing tool:
Designing and editing a homepage with Wix is very straightforward. It’s mostly clicking, dragging, and dropping elements and sections. It will just take some time to get used to the system.
A good homepage typically consists of an intro section with an eye-catching image and engaging header, followed by a section for prices, about us, customer testimonials, and unique selling points.
Step 7: Design other pages
After designing the homepage, move on to the other pages. Wix will automatically populate the pages with content to help you get started.
Just follow the process of editing and adding sections or elements to finetune the design. Here’s a few tips to consider for each main page:
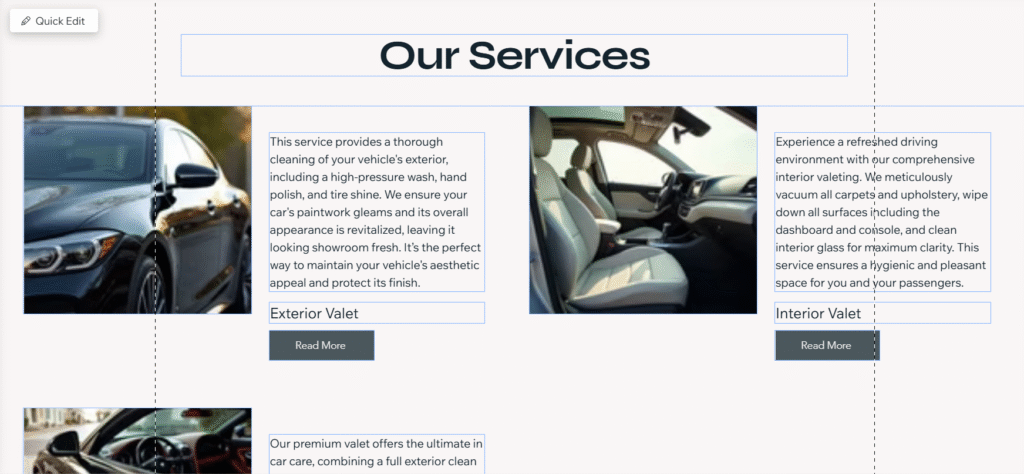
About
Your About page is an opportunity to tell customers about your mobile valeting company. Include important details like how long you have been in business, what areas your cover, and some of your unique selling points:
Prices
On the prices page, display a breakdown of the various services you offer. The best way to do this is by adding a services section to the page:
Make sure you include the name of the service, a short description, and the price of the valeting package:
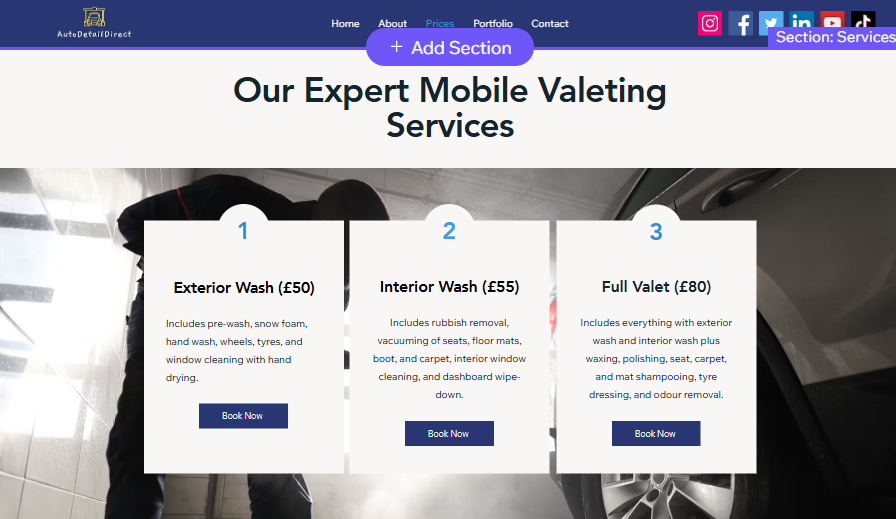
In the example above, I’ve created three packages to cover an exterior valet, interior valet, and full valet. You can also add a list of extras if you offer them.
Portfolio
In the Configure Pages section of this guide, I showed you how to add a portfolio page. Therefore, when you go to edit the portfolio page, a setup wizard will appear, allowing you to create a portfolio using AI or manually:
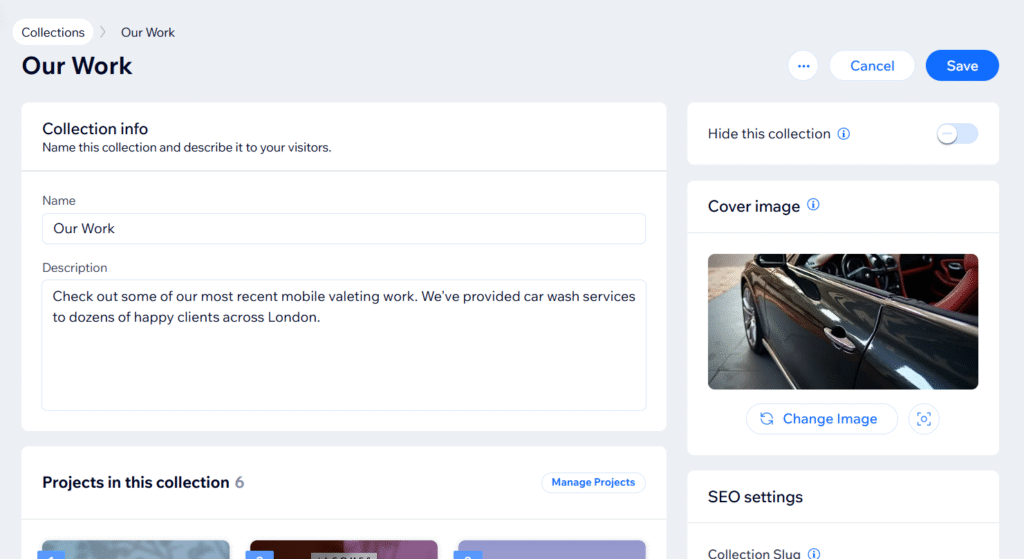
If you’re not using the portfolio page template, simply start with a blank page and add image elements or sections.
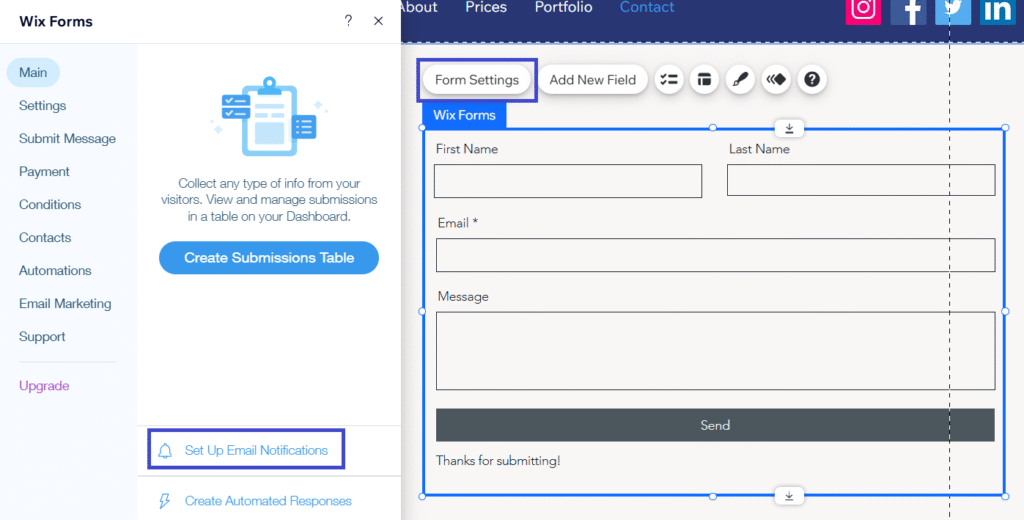
Contact
For the contact page, you’ll want to set up a contact form. To do this, drag and drop a contact form section onto the page. Wix will automatically create the contract form.
Click the Form Settings button and then select Set Up Email Notifications to ensure you get the messages when the form is submitted:
Privacy Policy
A privacy policy is a legal document that explains how a website collects and stores personal data. You must have a privacy policy when operating a website in the UK. Wix will automatically create a privacy policy page when you set up your website.
I recommend using a free privacy policy generator to create the document. It should include information about the data your mobile valeting website collects. You can then copy and paste the content to your privacy policy page.
Step 8: Optimise for SEO
Another important step is to optimise your site for SEO. If you don’t already know, SEO stands for search engine optimisation. Basically, it means improving your website for better visibility on Google and other search engines.
Wix makes SEO very easy. It’s one of the best features of the platform.
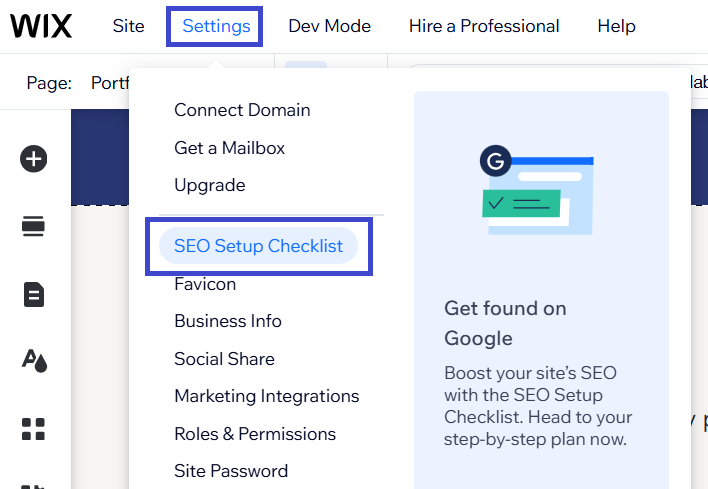
In the editor, click Settings and then select the SEO Setup Checklist:
On the following page, you’ll be asked a few basic question so Wix can make a custom SEO checklist:
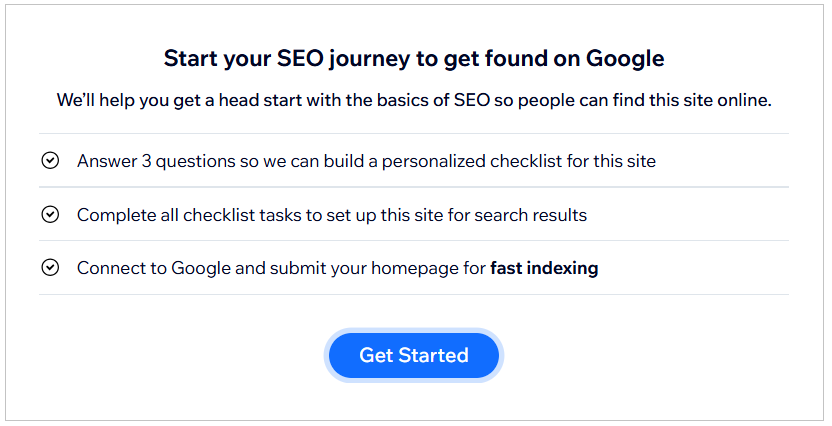
The questions will ask your business name, how you serve customers, and the main keywords for your site.
For keywords, add relevant keyphrases + your location, such as mobile valeting london, mobile car wash london, and mobile valeting service london:

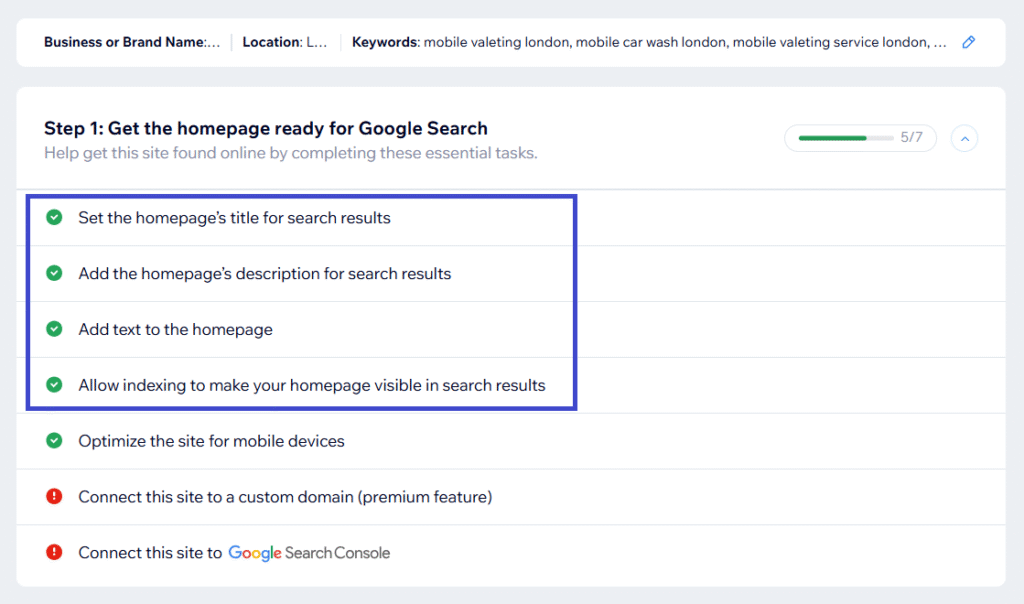
Wix will generate a tailored SEO checklist. Go through the list and follow the instructions to complete each step. You don’t need to finish all the steps right away, but the first four are essential:
Step 9: Publish the website
📆 Book a mobile valet near you
We'll match you with an approved valeter in your area — simple, fast, and hassle-free.
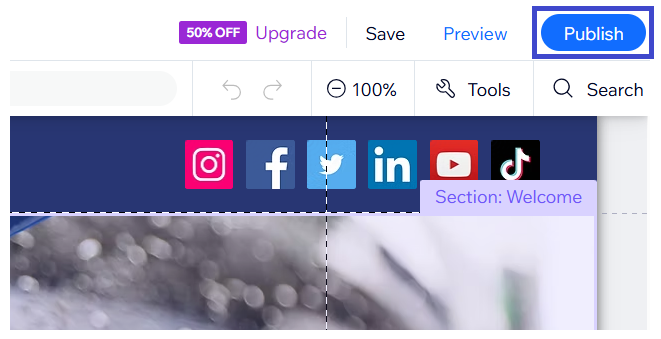
Once you’re happy with the website, click the Publish button:
Your website will be published on a Wix subdomain, which will look something like this: username/wixsite.com/websitename
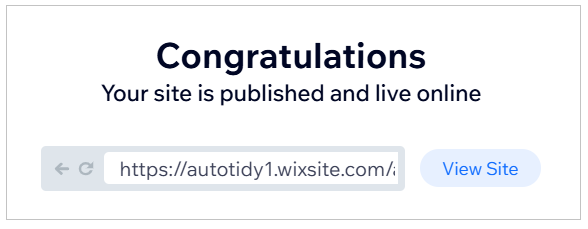
The site will be live and accessible to customers using this link.
Unfortunately, with the free version of Wix, you can’t connect a custom domain and ads will be displayed on your site.
If you want to use a custom domain, like myvaletbusiness.com, and remove the ads, you’ll need to upgrade to a paid plan.
The goods news is that the Lite plan costs only £11.50/month or £9/month when paying yearly. It also includes a free custom domain for 12 months.
If you want to upgrade and use a custom domain, click the Connect Your Domain option within the editor:
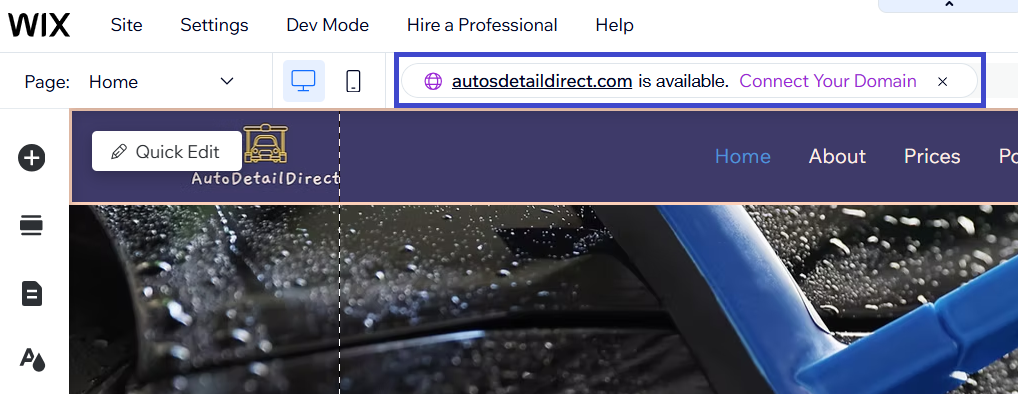
You’ll be directed to a page with some suggested domain names:

Just follow the steps to register and connect the domain to your website. Once connected, customers can access your site on the custom domain.
Quick Tip: If you upgrade to a paid plan and connect a domain, you can also get a business email, like [email protected]. Wix offers business emails through Google Workspace for a small extra fee. Go to Settings > Get a Mailbox to set it up:

Step 10: Track performance
Now that your website is live, the final step is to keep track of it’s performance. You can do this by logging into Wix and navigating to the Analytics section of the dashboard:
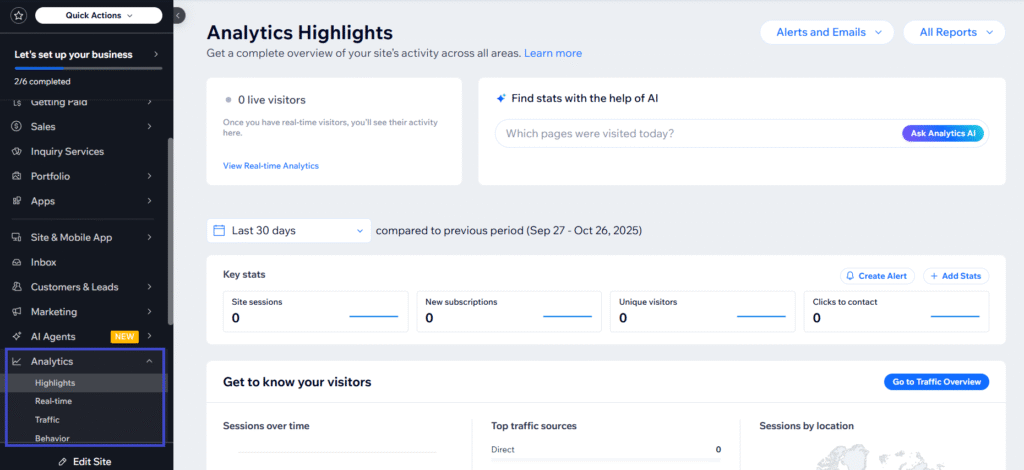
Here you will find essential data for your site including number of visitors, traffic sources, and engagement rate.
These statistics will provide you with valuable insights about your website, helping you to track the results of advertising and marketing campaigns.
Frequently Asked Questions (FAQs)
Is it free to build a website with Wix?
Yes, it’s free to build a basic mobile valeting website using Wix. However, the free plan does have a few limitations. You won’t be able to connect a custom domain and ads will be displayed on your site. The free version also has limits on storage and bandwidth.
How much are the Wix paid plans?
The paid plans for Wix start from £11.50/month or £9/month when paying yearly and include a custom domain, no ads, and more storage and bandwidth.
Do Wix websites include hosting?
Yes, all Wix websites include hosting, even with the free version. Therefore, you won’t need to purchase or configure hosting seperately.
Which Wix plan is best for a mobile valeting website?
If you’re happy to use a Wix subdomain, like mywebsite.wixsite.com, and don’t mind having ads on your site, the free plan is fine. The only real benefit of a paid plan is being able to use a custom domain and remove ads. In terms of designing a site, the free plan has almost all the same features as the paid plans.
Do I need any tech skills to build a website using Wix?
No, you don’t need any tech skills to build a website using Wix. The platform was designed for beginners and it’s very easy to use. It may take some time to get used to the system and features, but the designing is all done with a simple drag-and-drop editor.
Why do I need a website for my mobile valeting business?
A website is the ultimate way to increase credibility, showcase your work, share testimonials, and find more customers for your mobile valeting business. A website also helps customers to find important information about your company such as prices, services, operating hours, policies, and coverage areas.
How do I drive traffic to my mobile valeting website?
There are many ways to drive traffic to your mobile valeting website including using social media, optimising it for search engines, publishing blog posts, running paid ads, and using offline techniques like flyers or business cards.
What other platforms can I use to build a mobile valeting website?
Wix is a reliable choice for creating a mobile valeting website, but it’s not the only option. Weebly and Yola are also great solutions for launching a basic website for free. Other options include GoDaddy, Hostinger, and Canva, all of which have easy to use website builders.
Does a mobile valeting website require maintenance?
All websites require regular maintenance and updates to keep them fast and secure. However, when using a website builder like Wix, the platform handles hosting and software updates. Therefore, you only need to worry about keeping the content updated and making tweaks to the design to improve performance.
Conclusion
Wix is the best platform for building a mobile valeting website. Sure, there’s a a learning curve to overcome, but the platform is very user-friendly and it won’t take long to learn the mechanics of it.
Hopefully, this guide has helped you to understand the basics and put you a step closer to getting the perfect website for your mobile valeting business.
At the very least, you have a reliable way to get a professional website without spending a fortune. You’ll also have full control over the website so you can edit it whenever you want.
That’s it for this post, but check out our other guides for more useful tips to help you grow your mobile valeting business.